This post has moved to my new website HERE
Wednesday, April 27, 2016

Friday, March 25, 2016
Amigurumi Elephant Ears Free Pattern
I really love crocheting amigurumi animals. A few years ago I found a free pattern online to make various animals including this super cute elephant. I loved everything about it, except the ears, so I designed my own and came up with what you see in the photo below.

The pattern for the elephant can be found on the Premier Yarns website HERE.
To make the ears like I have them, start by making the inner ear, then make the outer ear and join the inner ear to that as you continue on with the outer ear to make the full ear. The rounds are worked in a continuous spiral so don't join the rounds.
Using beige or whatever contrasting colour you'd like to use, start with a slip knot then chain 2.
Round 1: catching the tail as you go (to close the hole in the middle), make 6sc in the 2nd chain from your hook.
Round 2: 2sc in each sc around - 12 sc
Round 3: *sc in next sc, 2sc in next sc; rep from * around - 18sc
Round 4: *sc in each of the next 2 sc, 2sc in next sc; rep from * around - 24sc
Round 5: *sc in each of the next 3 sc, 2sc in next sc; rep from * around - 30sc
Slip Stitch in the next sc and fasten off.
Your circle should look like the photo below.

Now you can make the outer ear. Use your main colour for this. I used green tones multi coloured yarn. Make this exactly the same as the inner ear but don't fasten off at the end of round 5.
At the end of round 5, chain 1 and turn the piece over.
Round 6 (wrong side): Sc in each of first 27sc. Chain 1 and turn
Round 7 (assembly round): Put the inner ear piece behind the outer ear with the right side facing out. Sc in first 27sc, through both thicknesses to join the 2 pieces together. Slip stitch and fasten off leaving a long tail for sewing the ears to the head.
The photos below show what the ear should look like (front and back) when it's finished.


Happy crocheting!
Sunday, November 15, 2015
Crochet Turkey

Head and body
Use an F/5-3.75mm hook
and dark brown worsted weight yarn.
Do NOT join rounds.
Work in a spiral instead.
Make slip knot then
chain 2.
Rnd 1: 6 sc in 2nd
ch from hook. Catch in the tail as you go.
Rnd 2: 2 sc in each sc
around – 12 sc
Rnd 3: *Sc in next sc, 2 sc in next sc; rep from*
around – 18 sc
Rnd 4: *Sc in each of next 2 sc, 2 sc in next sc; rep
from* around – 24 sc
Rnd 5: *Sc in each of next 3 sc, 2 sc in next sc; rep
from* around – 30 sc
Rnds 6-9: Sc in each sc around
Rnd 10: *Sc in each of next 3 sc, sc2tog; rep from*
around – 24 sc
Rnd 11: *Sc in each of next 2 sc, sc2tog; rep from*
around – 18 sc
Rnd 12: *Sc in next sc, sc2tog; rep from*
around – 12 sc
Rnd 13: Sc in each sc
around
Stuff head firmly.
Rnd 14: *Sc in next sc, 2 sc in next sc; rep from*
around – 18 sc
Rnd 15: Sc in each sc
around
Rnd 16: *Sc in each of next 2 sc, 2 sc in next sc; rep
from* around – 24 sc
Rnd 17: Sc in each sc
around
Rnd 18: *Sc in each of next 3 sc, 2 sc in next sc; rep
from* around – 30 sc
Rnd 19: Sc in each sc
around
Rnd 20: *Sc in each of
next 4 sc, 2 sc in next sc; rep from* around – 36 sc
Rnds 21-25: Sc in each
sc around
Rnd 26: *Sc in each of next 4 sc, sc2tog; rep from*
around – 30 sc
Rnd 27: *Sc in each of next 3 sc, sc2tog; rep from*
around – 24 sc
Rnd 28: *Sc in each of next 2 sc, sc2tog; rep from* around – 18 sc
Rnd 28: *Sc in each of next 2 sc, sc2tog; rep from* around – 18 sc
Rnd 29: *Sc in next sc, sc2tog; rep from*
around – 12 sc
Stuff body firmly.
Rnd 30: Sc2tog around,
sl st in next sc; fasten off leaving 12” yarn tail – 6sc.
Finish stuffing head
and body. Thread yarn tail through yarn needle and weave through each stitch.
Pull tightly to close opening. Knot yarn securely and thread yarn inside the
body.

Tail
Do not join rounds.
Slip knot. Ch 3. 7 hdc
in 3rd chain from hook – 8 hdc
Rnd 2: working in back
loops only. 2 hdc in each ch around – 16 hdc
Rnd 3: working in back
loops only. 1 hdc in next hdc, 2 in next – 24 hdc
Sl st in next sc.
Fasten off leaving long tail.
Feathers
Skip 4 stitches and
attach red yarn with slip stitch through back loop only of the tail piece. Ch1,
HDC in same loop. Hdc in next 2 stitches again in back loops only.
Row 2: Ch1 and turn.
2hdc in 1st stitch through both loops. 1 hdc in next stitch, 2 hdc
in next stitch, Ch 1 and turn – 6 hdc including the ch1
Rows 3-7: HDC in each
stitch across, ch1 and turn
Row 8: hdc2tog, 1hd in
next stitch, hdc2tog, ch1 and turn
Row 9: hdc2tog slip st
in next stitch and fasten off.
For the next feather
start in the next space on the main tail piece and attach the yarn through the
back loop only. I did red then blue, yellow, green and orange.
After you have done
all five feathers. Take the brown colour you used for the main tail piece and
attach with a slip stitch through the front loop only 2 stitches before where
the red/first feather starts. Sc in each front loop stitch around to 2 stitches
after where the orange/last feather finishes. Slip stitch and fasten off. Sew
tail on to body.

Beak
With yellow yarn, ch2.
Rnd 1: 6 sc in 2nd
ch from hook.
Rnds 2-5: Sc in each
Sc around. At the end of rnd 5 sl st in next sc and fasten off.
For the snood, attach
red yarn with slip stitch, sc in same stitch, sc in next stitch, ch 4, sc in 2nd
ch from hook, sc in next ch then sl st in next space on the beak and fasten
off. Sew beak to face.
Wings (make 2)
With body colour, ch 2
Rnd 1: 6 sc in 2nd
ch from hook
Rnd 2: *Sc in each of next 2 sc, 2 sc in next
sc; rep from * around – 8 sc
Rnd 3: sc in each sc
around
Rnd 4: *Sc in each of
next 3 sc, 2 sc in next sc; rep from * aroud – 10 sc
Rnds 5 and 6: Sc in
each sc around, at the end of rnd 6, sl st in next sc, fasten off. Pinch rnd 6
closed flat and sew wings to body.
Feet (make 2)
With orange yarn.
Row 1: *Ch 3, dc in 1st
ch, ch 1, slip stitch in 1st chain; rep from * 2 more times so you
have 3 toes.
Row 2: ch 1, turn, 1
sc in the base of each of the 3 toes, ch 3
Row 3: 1 sc in each of
the 3 sc across the foot, 3 sc in ch – 6 sc in a round
Rows 4-9: 1 sc in each
sc around. Slip stitch and fasten off at the end of row 9. Sew feet to body.
Eyes
Using black yarn start
with a magic ring, chain 1 then 5 sc in the ring. Pull up a loop of white yarn
and slip stitch through the back loop only to join. Continuing with white, slip
stitch again in same loop. Then go around the circle making two slip stitches
in every back loop of the single crochets. Slip stitch through both loops of
the first white slip stitch to join. Fasten off leaving enough black yarn for
sewing. Sew the eyes to the head.
Wednesday, October 7, 2015
Candy Crush Extra Lives Cheat For Desktop
It's a well known cheat to refill lives when playing Candy Crush on your phone or tablet, so this is the best way for most people to play. However, if you run out of levels to play, you might want to go play on the desktop version since new levels always appear there first. The problem is that it is harder to get more lives once the five are all used up. But don't worry - I found an easy cheat for you!
For this to work you need access to two Facebook accounts and the two must be friends. You will also need a phone or tablet with the Candy Crush app installed.
On the desktop, play Candy Crush with your main account until you have zero lives. On your phone or tablet you need to be logged in with an alternate Facebook account. If you are logged in with your main account log out using the gold icon in the bottom left of the Candy Crush app. Then you will need to go into the Facebook app and switch to your alternate account. Then go back to the Candy Crush app and connect to Facebook.
In the Candy Crush app on the phone press on one of the levels that you already played with your main account, find yourself on the scoreboard for that level then send yourself a life. Then kill the app by pressing the home button and swiping the app. On the desktop browser hit the page refresh. This should give you an extra life and also tell you your friend (alternate FB account) sent you a life - press accept and you should have 2 free lives. And that's it!
Now you can play or get 2 more lives by reloading the app on the phone, sending another life then refreshing the desktop browser page. Don't forget to kill the phone Candy Crush app each time.
Let me know if this works for you!
Thursday, December 26, 2013
Monday, March 18, 2013
Crochet Kitty Giveaway

Welcome to my first giveaway where you can win this adorable kitty cat in black and rainbow colours!

This little kitty has been specially made for this giveaway. The bright colours have been chosen to contrast with the black head and body. It would be perfect for a child to carry around or take along in the car or diaper bag. It could also be perfect for adults as a desk top friend to brighten your day.
This Giveaway is open to residents age 18+ of USA, UK and Canada (excluding Quebec). Void where prohibited. Shipping/Postage will be paid by Krazy Kabbage.
Use the Rafflecopter form below to enter this giveaway. All entries are optional but must be completed correctly or will be void. If you need help, have questions or spot and error please contact me via my Krazy Kabbage Facebook Page (link in top right).
Thank you and Good Luck!


|
a Rafflecopter giveaway |
Tuesday, February 12, 2013
Granny Circle Squares Blanket
I wanted to make a blanket made up of circles joined together. I found a pattern and tried to follow it, however, since I haven't been crocheting all that long I just couldn't make sense of it and had to give up. Then, I thought I should just try and make my own simple circle pattern... and that's how I got this blanket.

I decided to play about with my newly created pattern a little and came up with 3 different styles of circles simply by using different colours for different rounds. I then reversed these colour combinations to create 6 different circles.

Now I'm going to try and share this pattern with you, this is my first pattern so I hope it makes sense. I'll start off with the circle seen in the top left of the picture above - large white circle with multi-coloured. I used Red Heart Super Saver Yarn in Soft White(colour 1) and Bon-bon (colour 2) but you can use whatever colours you like. I used a 6mm J hook, if you are more experienced you may choose another size, I just used the J hook because it looked like a nice size for this kind of project. I'm not sure what to tell you about gauge since I don't understand this either... maybe in a few months I'll have it figured that out :-)
Krazy Kabbage's Circle Squares Pattern
Using J hook and worsted weight yarn
With C1 (colour 1) chain 4, sl st to form ring.
Rd1: sl st in ring, ch 2, 11 dc in ring sl st into top of 1st dc (12dc)
Rd2: sl st in 1st space, ch 2, dc in same space, 1dc in next space, *2dc in next space, 1 dc in next space* repeat from * sl st in top of 1st dc (18dc)
Rd3: sl st in 1st space, ch 2, dc in same space, 1dc in next 2 spaces, *2dc in next space, 1 dc in next 2 spaces* repeat from * sl st in top of 1st dc (24dc)
Rd4: Repeat round 3 (32dc)
Fasten off then attach C2 (colour 2) in 1st space.
Rd 5 (1st round of square): Ch2, dc ch2, 2dc in same space for the 1st corner, * dc in next space, hdc in next, sc in each of next 3 spaces, hdc in next, dc in next, (2dc, ch2, 2dc in next for corner) repeat twice from * sl st into top of 1st dc (you should have 11 stitches per side and a total of 44)
Rd 6: sl st in 1st space, ch 2, *(2dc, ch2, 2dc) in next space, dc in each of next 10 spaces, repeat twice from * sl st in 1st dc, fasten off (56dc or 14dc per side)
For variation 2 (shown in top centre of photo above), do rounds 1 and 2 in colour 2, rounds 3 and 4 in colour 1 and rounds 5 and 6 in colour 2
For variation 3 (top right of photo above), rounds 1 in colour 1, round 2 in colour 2 and alternate the colours (rds 1, 3, 5 in white and rds 2, 4, 6 in multi)
Reverse the colours to make the 3 squares shown on the bottom row.
I made 6 of each square so I got 36 squares and arranged them as show in the photo below.

The squares seemed a little small to make a blanket so I decided to make them bigger by going around each one in purple. To achieve this simply repeat round 6. If you want to make them even bigger just repeat the round again, or make more squares for a bigger blanket.
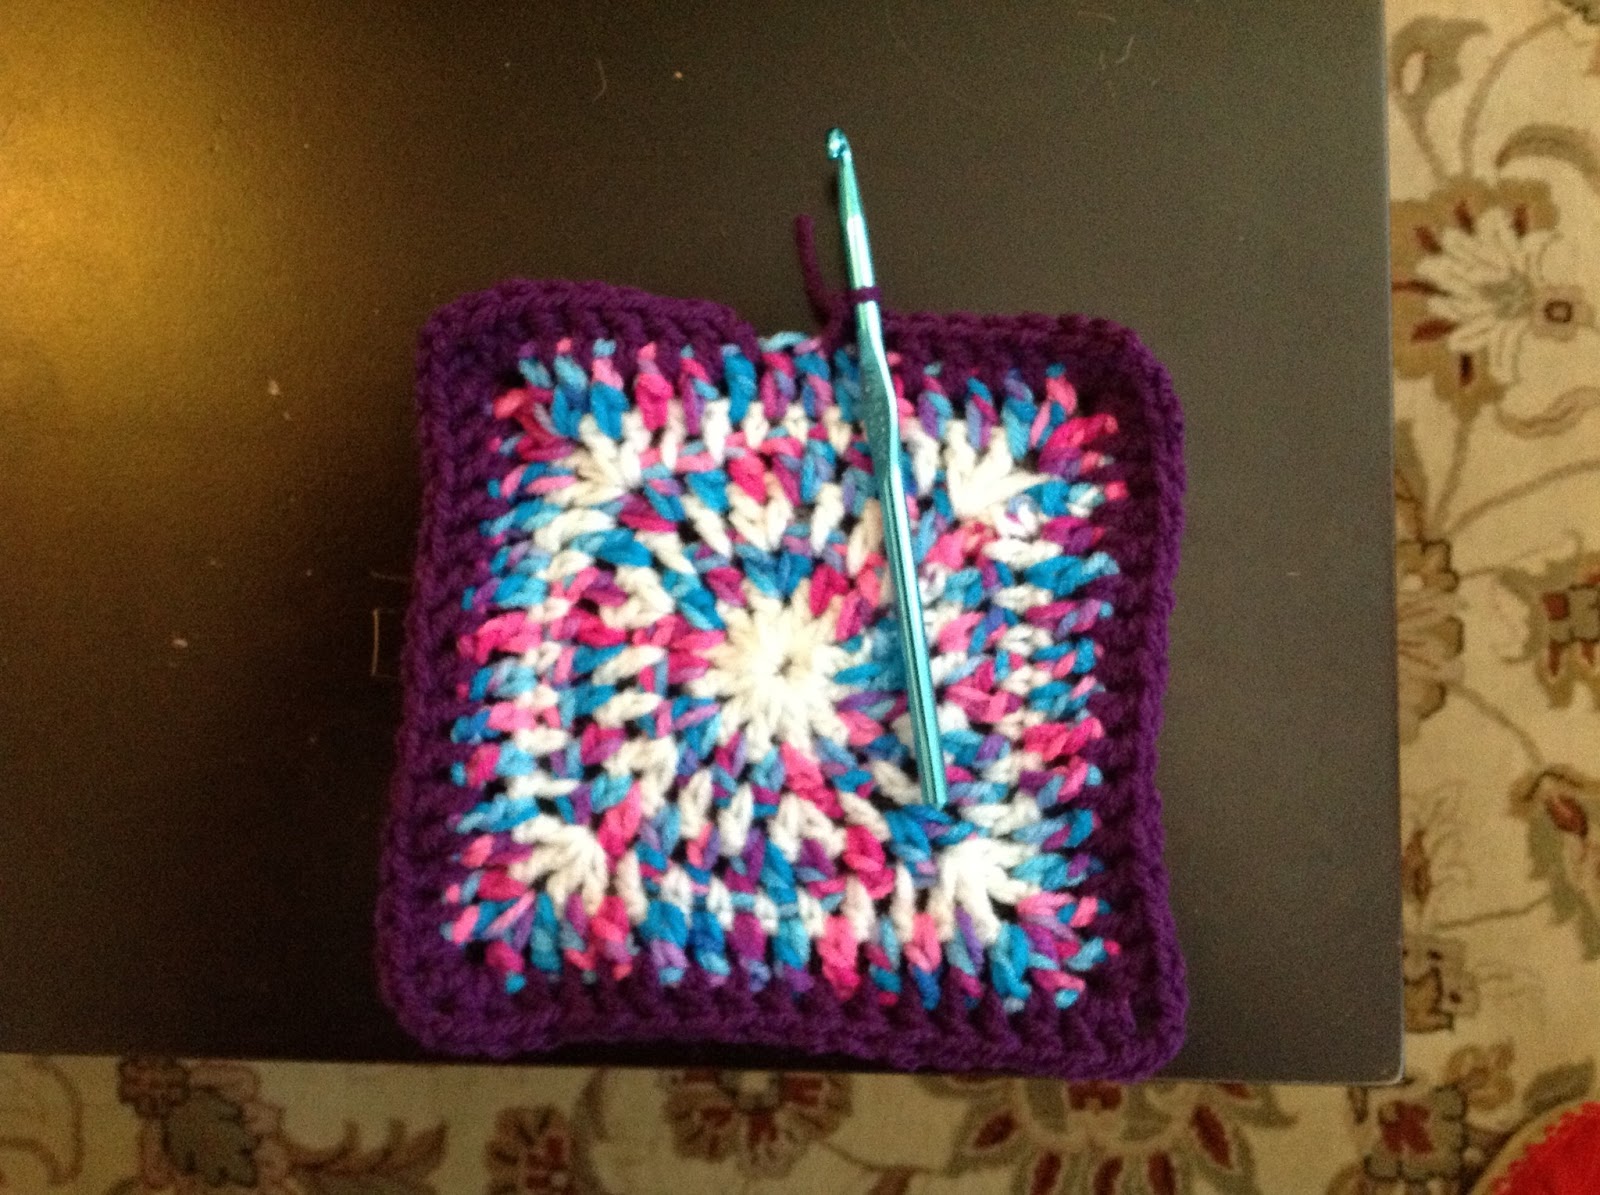

Joining the squares
To join them together, I laid them face up and single crocheted across starting with a slip stitch through the adorning corners of the first 2 squares (top right square and the one below it) then SC in same space and each space across. Do this five times so the squares are joined horizontally. Turn the blanket and repeat the process adding in 1 chain stitch to jump over each of the previous joins.
 |
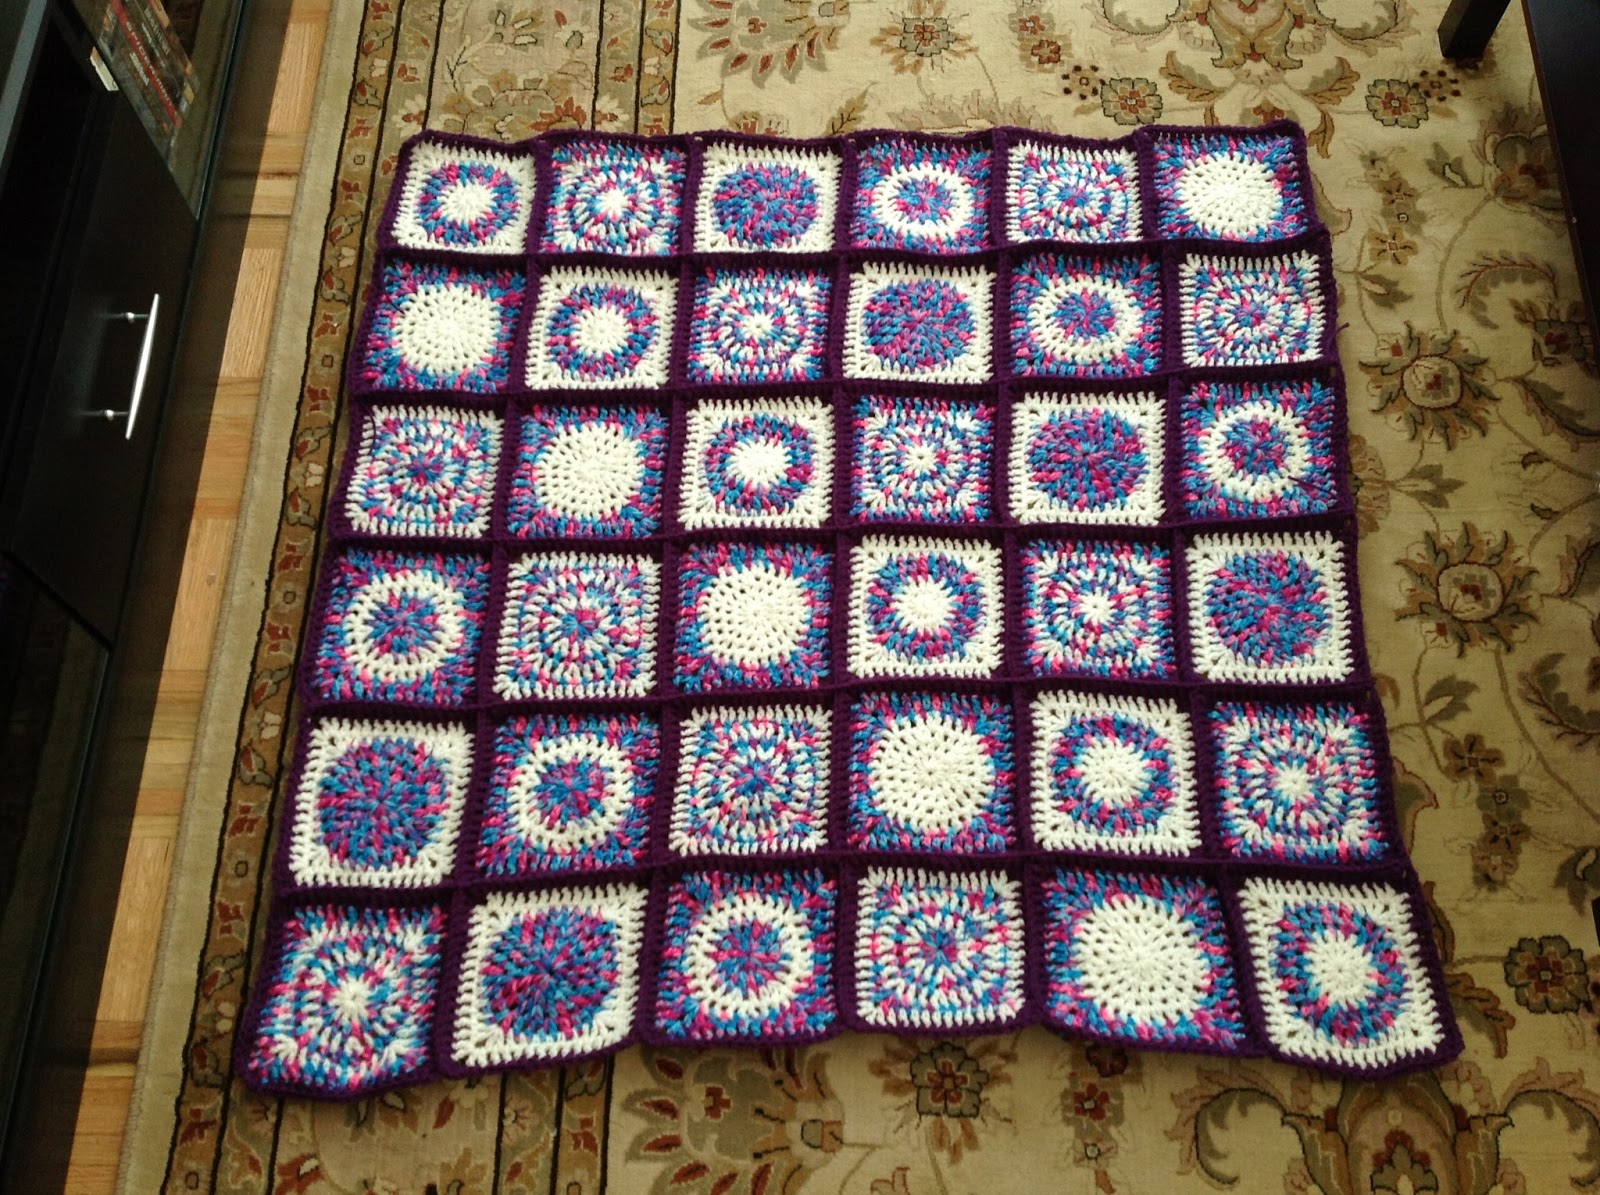
|
Boarder
For the border I double crocheted all around in the dark purple.
Round 1: Fasten the yarn with a slip stitch into any space, ch 2, dc in each space across, (2dc, ch2, 2dc for corners) sl st to join through top of 1st stitch and fasten off.
Round 2: Using white, repeat round 1.
Round 3: Using purple, repeat round 1.
I hope you enjoyed this pattern. I'd love to know what you think. If you use my pattern and post it online please give me, Krazy Kabbage, credit and provide a link back to this post. Thanks!
Also, while you are here, would you mind voting for me on a facebook contest?
I'm trying to win a crib and it ends March 1st 2013. Here's the link (click link, press vote next to Kat) https://apps.facebook.com/easypromos/voteme/69654/618384197 Thank you!!
Subscribe to:
Posts (Atom)